
San Francisco Modern Molding for LED's creating perimeter lighting above a contemporary hotel reception area

INSTALLATION MANUAL

Molding for Indirect Lighting Installation Instructions

Indirect Lighting Crown Molding Installation Guide. Use construction adhesive with brads/nails every 12–16 inches, mount molding to one surface only, maintain consistent spacing, and caulk edges for a clean finish.
All Installation Manuals

Installation Basics

  • Use construction adhesive with brads/nails every 12–16 inches.
  • Mount molding to one surface only (wall or ceiling).
  • Maintain consistent spacing for proper lighting.
  • Caulk edges for a clean finish.

Tools & Materials

  • Miter saw, air nailer, adhesive, caulking gun
  • Chalk line, pencil, putty knife
  • Sandpaper, sponge/cloth
  • 6d/8d nails (1/2″–3/4″ penetration)

Choose the Installation Type

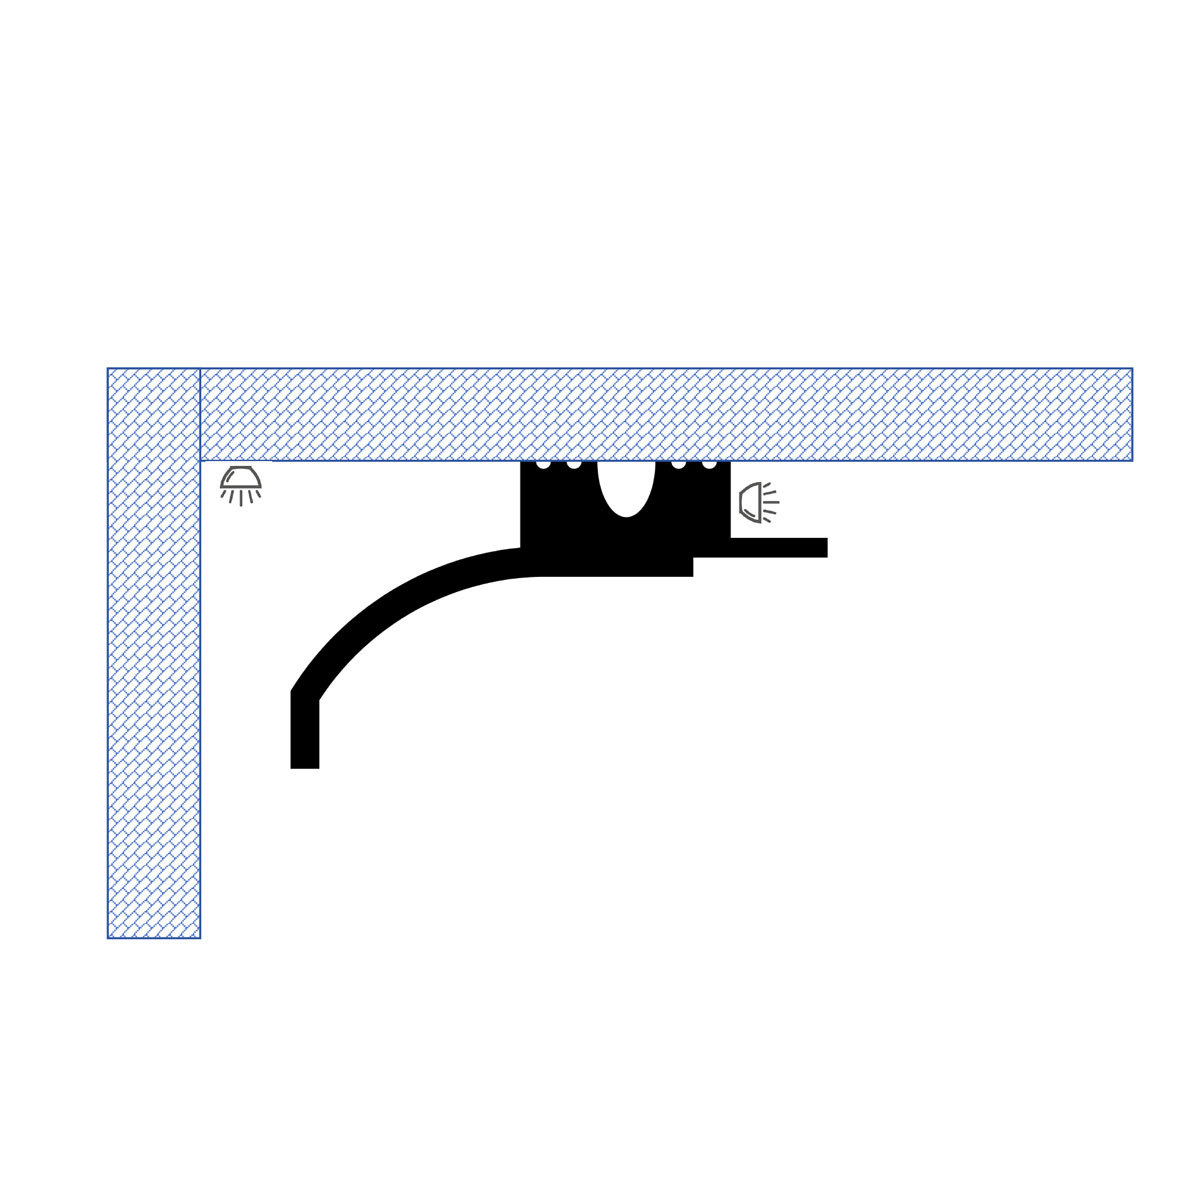
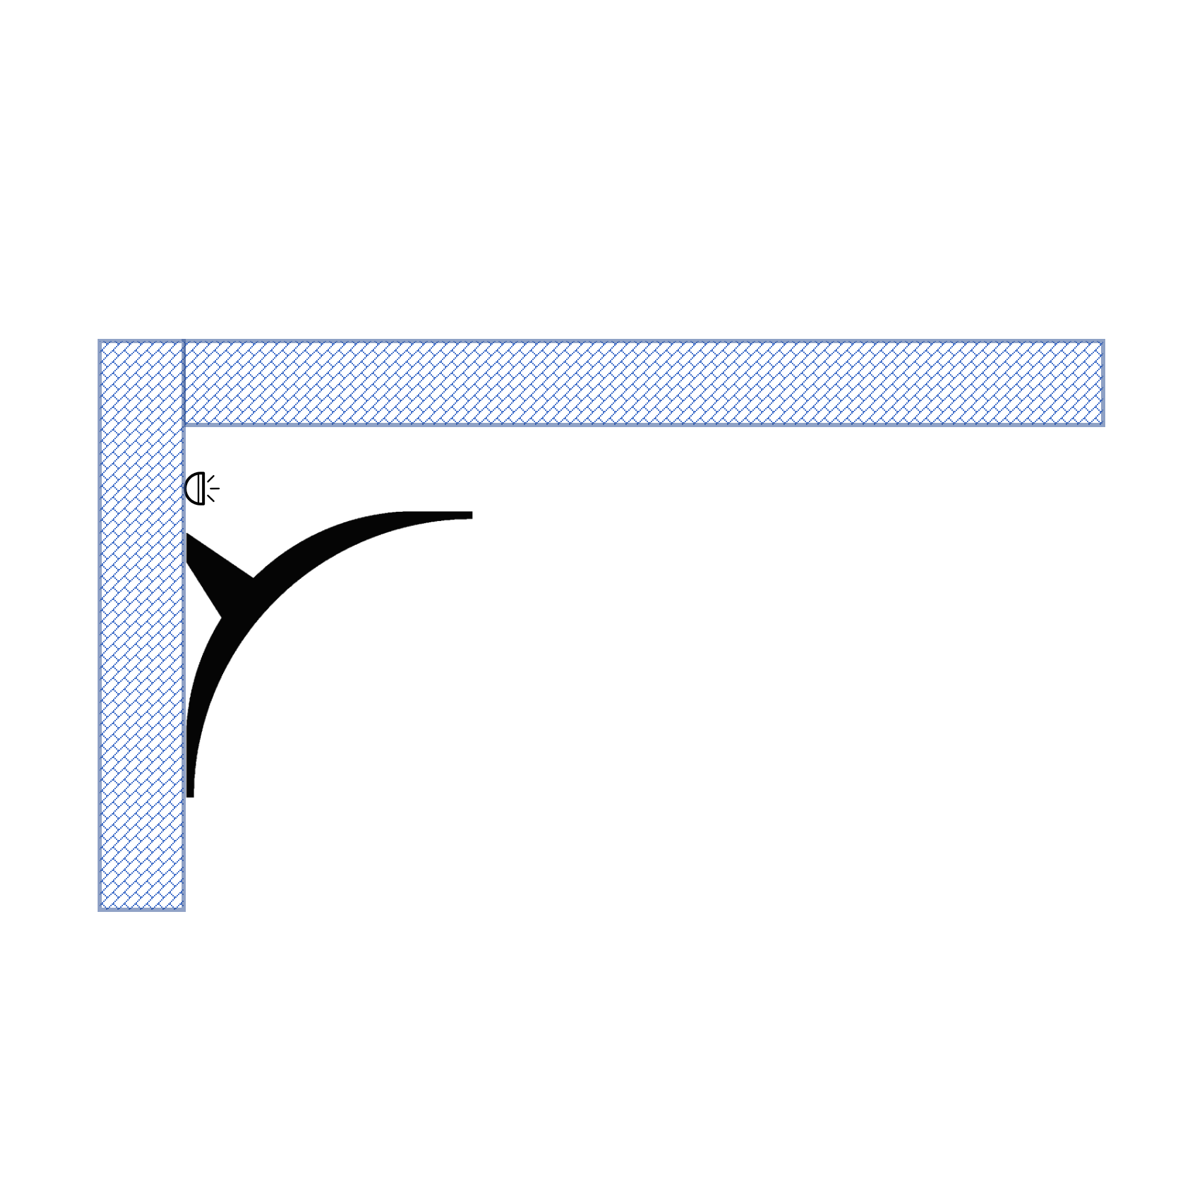
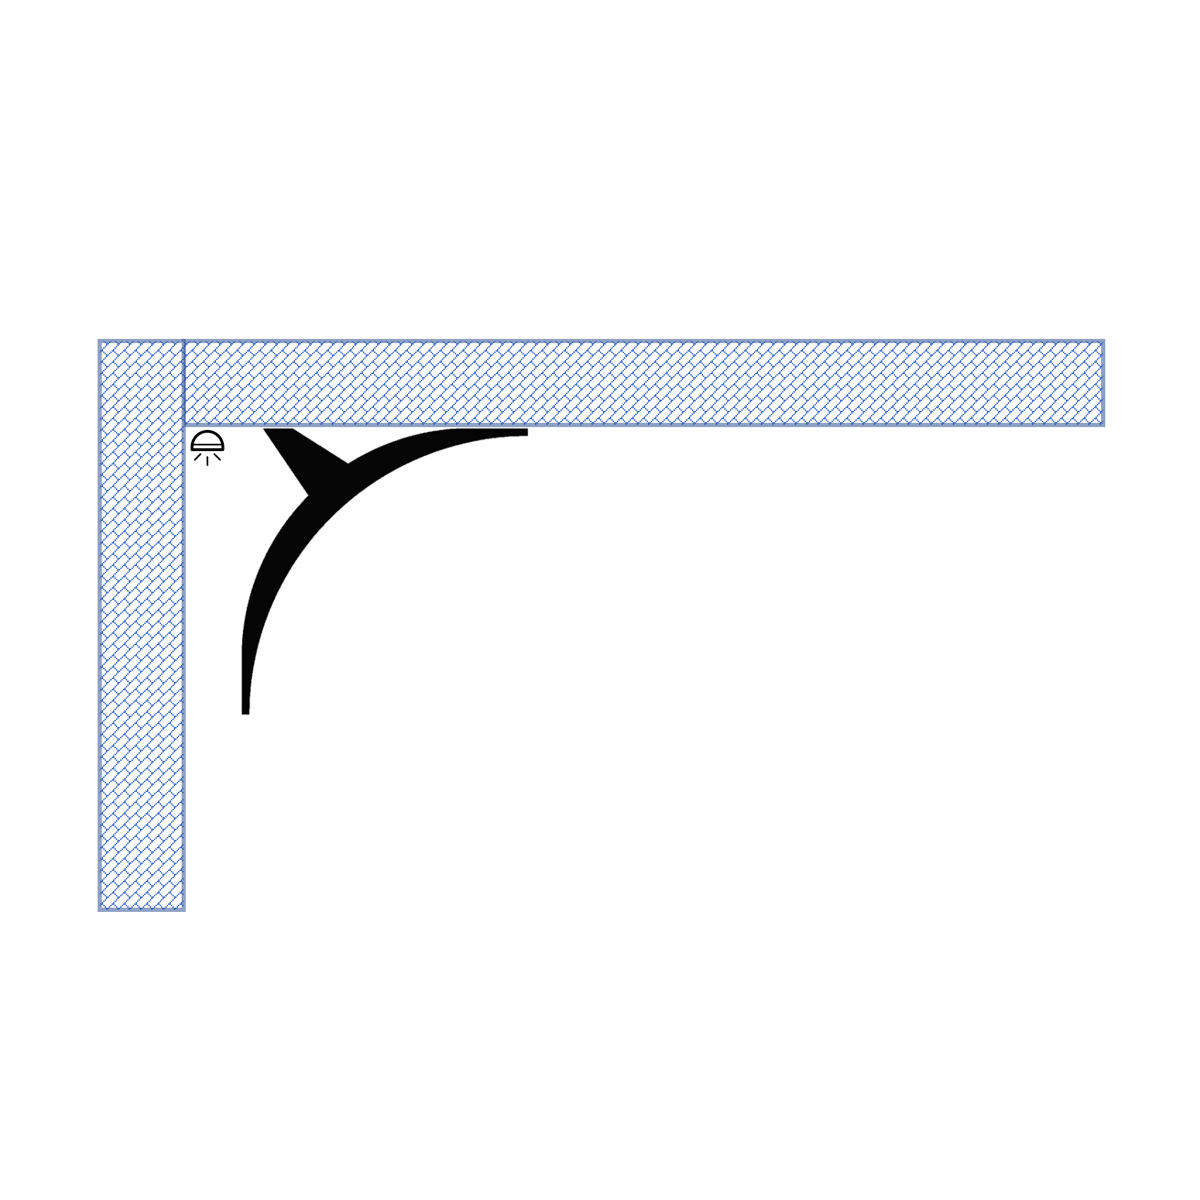
Plan the layout and determine the installation type: wall, ceiling, or 2-way.

Cove molding installation diagram showing indirect lighting concealed between the wall and ceiling

Wall Mounted
Ceiling Glow

Cove molding installation diagram showing downward indirect lighting concealed at the wall and ceiling

Ceiling Mounted
Wall Wash

Two-way cove molding installation diagram showing concealed downward and wall-wash indirect lighting

2-Way Profile
Ceiling + Wall

Installation Overview

  1. Plan layout and determine installation type (wall, ceiling, or 2-way).
  2. Mark level reference lines using a chalk line or laser for consistent placement.
  3. Cut molding to size and dry-fit all joints and corners.
  4. Apply construction adhesive to contact surfaces and seams.
  5. Secure molding using nails or brads every 12–16 inches.
  6. Install LED strips in trough or behind molding, recessed from edge.
  7. Ensure LEDs are not visible from normal viewing angles.
  8. Fill nail holes, sand smooth, and apply caulk to all visible edges.
  9. Molding is already primed so paint to suit (either water or oil-based paint can be used).
  10. Test lighting in low-light conditions before final completion.

Safety & Handling Guidelines

  • Use caution with all power tools and follow manufacturer instructions.
  • Ensure adequate ventilation when cutting or sanding.
  • No respirator required under normal conditions (dust mask optional).
  • Wear safety glasses with side shields when cutting or fastening.
  • Protective gloves recommended but not required.
  • Eye wash station should be available when cutting or sanding.

Download the Installation Guide

Save the complete Indirect Lighting Crown Molding Installation Guide as a PDF.

Download Installation Guide PDF